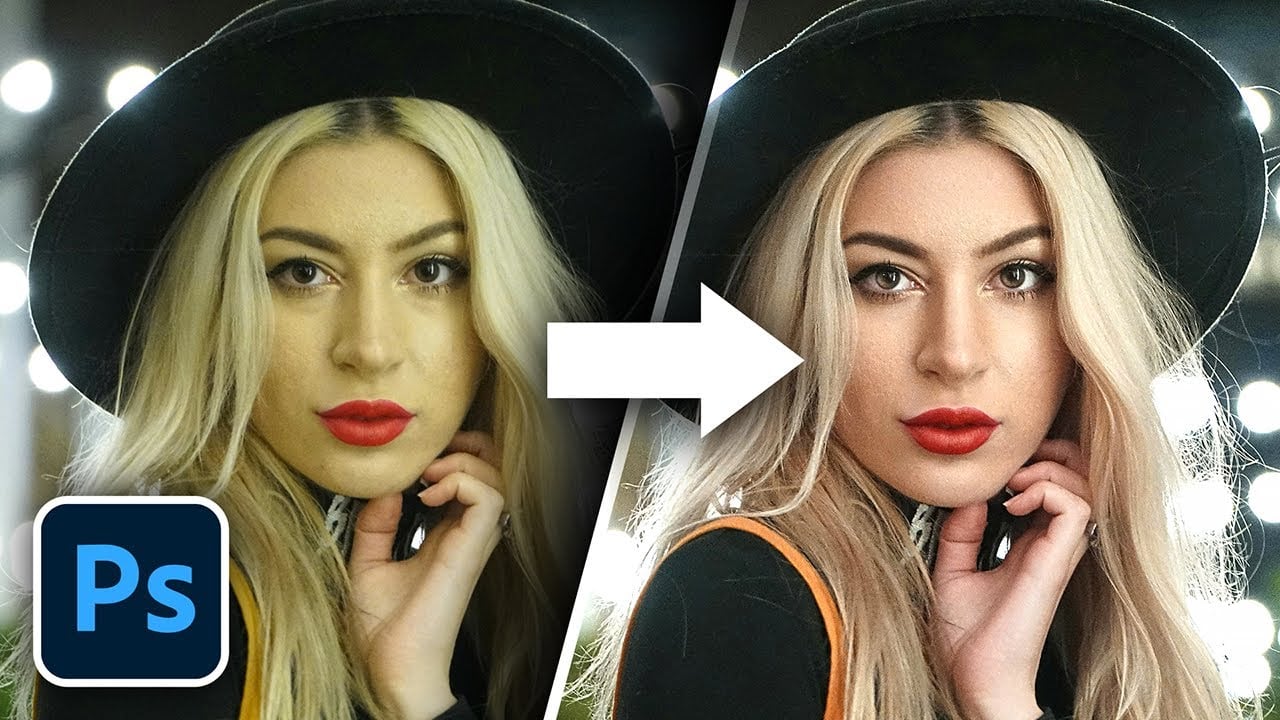
Unwanted green tones in your portraits can happen for many reasons (one of them is owning an old Nikon camera and using auto WB; ask me how I know). Whatever the reason, these hues leave your subjects looking like they belong in a superhero movie rather than reality. In his recent video, Unmesh Dinda shares a simple tutorial for removing that stubborn green cast and bringing natural skin tones back to your photos.
Let’s jump right into it. Of course, start by opening your Hulk-like portrait in Photoshop. Click the adjustment layer icon on your Layers panel and select Hue/Saturation. In the adjustment layer window, click on any green area on your image. Photoshop will automatically target those greens (which might show under yellows initially).Slide the Hue bar all the way to the right to see the targeted color range clearly.
Now comes the magic: Use the Range slider to narrow down the targeted colors. Aim for a range that selects only the green cast and not the natural skin tones. Hold the middle point of the Range slider and drag it left and right to achieve the desired selection. You can see the targeted colors highlighted in the top bar of the adjustment window. Once you have a good selection, expand the range slightly using the outer handles of the Range slider. Be careful while expanding towards the left, as you don’t want to target reds. Adjust the Saturation slider to zero for the targeted colors. This effectively removes the green cast.
Now that the green is gone, it’s fine-tuning time. Adjust the Hue slider back to a natural skin tone range. Unmesh suggests a value around -18, but feel free to experiment to find the perfect hue for your photo. Play with the Lightness slider to adjust the brightness of the skin tones. Increasing lightness can sometimes affect saturation, so you might need to bump up the saturation again to compensate.
Adding a mask for extended editing
If the green cast affected other areas besides the skin, you can refine the adjustment using a mask. Click on the mask thumbnail of the Hue/Saturation adjustment layer to create a mask. Select the Brush tool and choose a soft round brush. Set your foreground color to white (press X to switch between foreground and background colors). Carefully paint over the areas you want the adjustment to affect, like the skin and clothes. This will hide the adjustment’s effect on areas you leave unpainted.
Final touches (optional)
This is where you can add your personal touch to the photo. Unmesh suggests creating a Curves adjustment layer to enhance the overall contrast and brightness.
Lastly, remember, this is just a basic guide. The specific adjustments will vary depending on your photo. Still, use this guide and experiment with sliders and masking to achieve the perfect, natural skin tones in your portraits.


