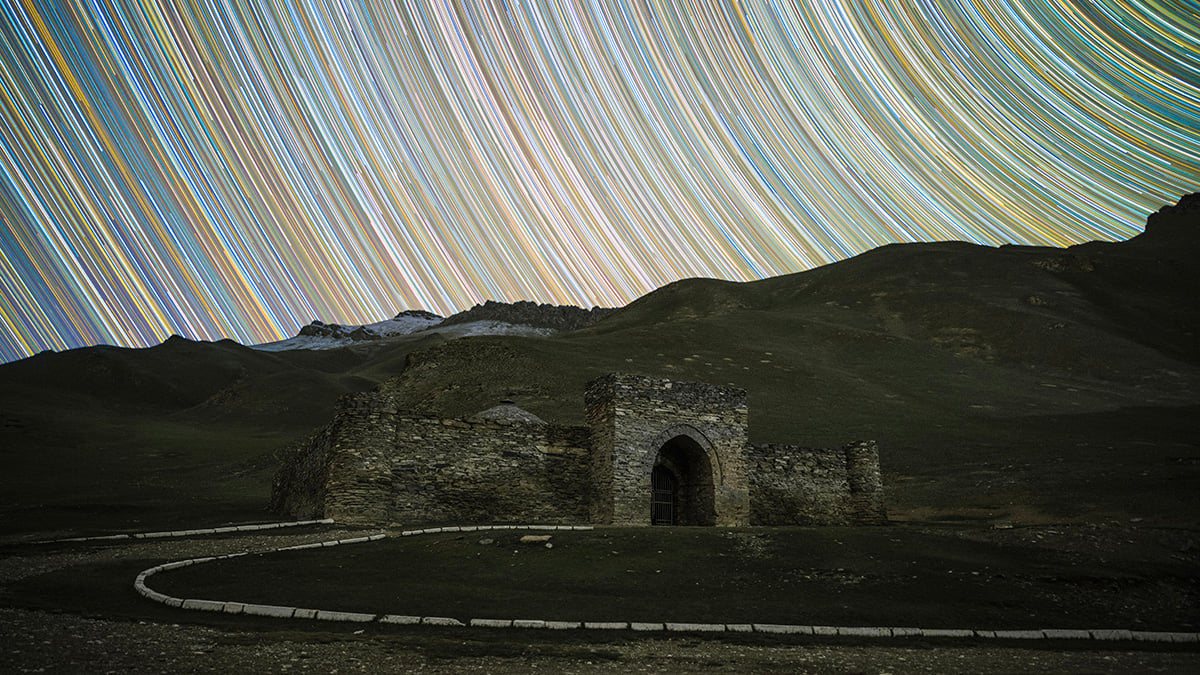
Whether you are a seasoned astrophotographer or a beginner, star trail images should always succeed in mesmerizing you. Star trail images, although considered technically less challenging and beginner-friendly, will need quite a few sessions and experiments to achieve better results. In this article, we share ten tips for photographers to take your star trail images to the next level.
1. Star colors are important
While photographing stars with a wide-field lens, we tend to overlook the colors of the stars. However, when you finally blend multiple images to create a star trail, these colors can make or break an image. To get the colors of the stars, it is important not to overexpose the image, rendering only white stars in the image. Rather, you may even underexpose your image and do the necessary brightness adjustment in post-processing.
2. Separate exposures for the foreground
Considering the above suggestion, now that you have shot your star images exposing the sky and star colors, your foreground will remain dark. Especially when you are photographing from a dark location, and the only source of light is the stars, foregrounds are always darker than the sky. To get a good image, take separate images for the foreground from the same tripod position. This may be done before or after your sky images only once you have finalized your composition.

3. Go beyond the conventional 30-second exposures
Conventionally, star trail images are captured with multiple 25 or 30-second exposures. This has become a standard since most of the cameras do not allow interval exposures of more than 30 seconds (except for the bulb or time modes, which are not used for star trail images). However, with the addition of an intervalometer and some modern mirrorless cameras that allow extended shutter speed, you can go well beyond 30 seconds. Try 2 or 3-minute exposures. This will not only help you to reduce the number of total images, but you can also keep your ISO lower to get a better dynamic range in your image.

4. Minimize the gaps in the star trail
Star trail images with gaps in between the trails do not look as good as a seamless star trail. In order to reduce gaps, try to minimize the intervals between your images. With modern cameras and memory cards, image reading is extremely fast, and you won’t face any problems with a 1-second interval. Also note that some cameras do not exactly take 30 second exposures when you ask it to do it, the real exposure time could be 29.5 or 30.5 seconds. See if your camera does this, and while choosing the minimum interval, take it into account.

5. Try different focal lengths
Conventionally, star trail images are captured with wide-field lenses. However, they look fantastic with longer focal lengths, too! Try using different focal lengths for your star trail images. A 35mm, 50mm, 85mm, 135mm or even 200mm focal length can generate exciting images. Compose your image accordingly and reach closer to the stars (and the foreground).

6. Try different post-processing methods
Star trail images can be stacked using at least three methods: via Photoshop, Sequator, and StarStax (of course, there are other software, too). Experiment with all of them since all of them seem to deliver slightly different outputs. With the same data set, try all the options and compare their outputs. Choose the one you like the best. After a couple of such experiments, you can stick to the one which always seems to give you the best output.

7. Get longer trails by extending your shooting time
With a wide-field lens, you might need at least 2-3 hours’ worth of data to fill the sky with stars. Unless you decide not to do that, get enough images of the stars and do not rush to end the session. Remember, the wider you shoot, the more time you need to spend. In case you are using a mid-telephoto focal length like 135mm or 200mm, even 30-45 minutes worth of data will fill up the sky.
8. Always check your battery level before beginning
Star trail images can take hours to capture. Before beginning your image sequence, check for your battery level. If you think that your battery won’t last till the desired end of the session, attach a new battery. Alternatively, you can choose to use a dummy battery or charge your camera directly via a power bank. Ensure that your camera won’t stop taking pictures before you tell it to do so.

9. Check for dew in the field
Dew is not a good friend for astrophotographers. Nights with heavy due can ruin your images within a matter of a few minutes. Before starting your star trail sequence, check if there is dew. A dew heater or lens warmer will be your best friend for these nights. Attach your lens warmer carefully on top of the front element of your lens to keep your lens glasses warm. This will prevent dew formation in front of your lens. Attach your lens warmer before your final focusing routine as lens warmers can mess up your focus while attaching.
10. Keep everything manual
Starting from your focus, keep every setting manual and under your control, including your white balance. A daylight or direct sunlight white balance gives you the closest results of a night-time scene. And do not forget to shoot in RAW.

We hope that these tips will help you get better star trail images. Clear skies!


